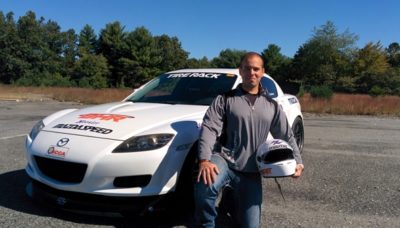
The guide to converting a Series 1 (2004 – 2008) or Series 2 (2009 – 2011) RX-8 into a D-Street Prepared autocrossing beast.
In 2013, the SCCA Solo Events Board moved the Mazda RX-8 from B Street Prepared (BSP) to D Street Prepared (DSP). Since the change, racers have considered building an RX-8 for the class because it is more competitive. When it comes to Street Prepared rules, however, it can be hard to determine what to modify first. With a wide array of allowances, between adding wide wheels and tires, fender cutting, aerodynamic pieces, engine work, update/backdate allowances and much more, determining priority can be overwhelming.
Mazda Motorsports turned to Marc Monnar, who has been autocrossing since 2008, to write a guide intended to help those who own a Series 1 (2004 – 2008) or Series 2 (2009 – 2011) RX-8, and are looking to get their feet wet in DSP. We hope Marc’s guide helps!
Below is a list of recommended steps to take and parts to purchase when building your RX-8, ordered by suggested priority. With a modification budget of $10,000 (not including maintenance and update and backdate), you will be able to complete everything on this list and turn your car into a contender! If your RX-8 is already modified and/or built for another class such as Street Touring Xtreme (STX), then the jump to Street Prepared is not as big as it would be for someone starting from scratch.
MAINTENANCE
This topic cannot be stressed enough. A phrase that I have heard for years is, “Welcome to Street Prepared.” What that really means is, “Welcome to a class in which things can and will break.” Before any modification, ensure your basics are covered: Fluids, engine compression check, spark plugs, intake or exhaust leaks, vacuum leaks, reattaching loose plastic trim pieces, cleaning your MAF, V-belts, checking 02 sensors, refreshing chassis bushings, etc. This may seem discouraging at first, but you will feel more confident in your car in the end. You will know exactly what has been replaced, when you will need to replace it again, and it will help you troubleshoot problems more easily in the future.
WHEELS AND TIRES
The first modifications to consider are lightweight, wider wheels and some fresh R-compound tires. Street Prepared is the first category (now that the Stock category was changed to street tires exclusively) that can run R-compound tires. These tires offer the highest level of grip in a DOT-approved tire and all serious competitors run them. Fitment can be an issue; you may have to roll or slightly pull your fenders for wheel and tire clearance. You have to consider clearance not just in a straight line, but also when the car is turning and the suspension is loaded. Wheel size is optional in either 17 or 18 inches, but optimal width is around 10in. wide. With a 10in. wide wheel, an offset such as +38 or +35 works well for fitment, both inboard and out. Once you have determined your wheel diameter, width and offset, the next step is deciding the actual tire size. The recommended size for an 18in. wheel is 285/30, and for a 17in. wheel is 275/35. Tire pressures are not the same from car to car, so don’t be afraid to experiment. A pound here and there, up or down, can really make a difference.
– To meet the $10,000 budget, expect to spend around $1100 for wheels and $1400 for one set of tires.
– Extra Cash – If you have the extra money, check out two-piece lightweight brake rotors. They save weight on rotating mass, which is crucial to helping your car get up to speed faster.
SUSPENSION AND CHASSIS
Next on the list is suspension work. Consider adjustable shocks with adjustable spring perches and springs (also known as coilovers), along with adjustable endlinks and swaybars as a good starting point. Changing these parts will accomplish several things: eliminating a lot of body roll, lowering the car, gaining more negative camber, and improving the overall handling of the car. Shock brand is often a personal preference; just ensure the shocks are valved for the spring rates you run. Starting on the stiffer side of spring rates (such as 730 lbs. – 13kg/mm – in front and 560 lbs. – 10kg/mm – in back) works better when dealing with R-compound tires as opposed to starting off soft. Adjustable swaybars are your best bet, as it can save you from purchasing several and changing them based on tire life and racing surface. Endlinks are simple – just ensure they are height adjustable so that they fit properly once the car is lowered.
For a balanced alignment, I recommend at least -2.5 degrees camber front and rear, with 1/8-inch toe-out in the front and 1/16-inch of toe-in in the rear, and low caster. Once your suspension setup is complete, test it out and see how it feels. Fine tuning will need to happen from here, but be sure you are dialing it in on good tires. If not, you’ll have a setup that works for bad tires as opposed to fresh tires.
– To meet the $10,000 budget, expect to spend around $3,000-$3500 for springs and shocks; for endlinks, cost is around $150; for swaybars, found at MAZDASPEED’s parts support program, cost is about $300.
– Extra Cash – Other, less expensive goodies to add on might be either Delrin upper control arm bushings for the front, or lightweight strut bars found at MAZDASPEED’s parts support program to help tighten the chassis. Both are cheap and quick mods that complement whatever setup you choose.
AERODYNAMICS
Aero pieces for the front and rear are a debatable second or third place on the long list of upgrades. I list this right next to suspension because the moment you get aero, you will have to make all sorts of changes to your alignment, spring rates, and swaybars. Why get all your suspension dialed in, just to add aero and then redo it again?
In my testing, I found aero to be very helpful. Aero pieces allow you to carry a lot of speed into sweepers, be full throttle in fast slaloms, and be on the throttle earlier exiting an element. Once you have configured your suspension setup properly for aero, you’ll be able to rotate very nicely around low-speed elements, while still having the car be balanced at medium to high-speed elements.
– To meet the $10,000 budget, expect to spend around $375. Consider Joefis Racing.
ENGINE AND EXHAUST COMPONENTS
There are only three modifications that I feel are important enough to be done first under this category: Upgraded ignition coils, a catless midpipe, and an engine tuning device (handheld or stand-alone ECU) are what I have in mind.
The stock coils on the RX-8 tend to fail very early due to overheating easily, degrading your overall ignition performance quickly. Once you upgrade these to stronger ignition coils that have a built-in heatsink, you should be good to go. Going with a catless midpipe is key because not only do the stock catalytic converters clog easily, but after getting a tune they have been known to melt. Once the catalytic converters are removed (it is recommended to choose a midpipe that at least has a race muffler on it), this will allow the exhaust to flow freely, allowing you to tune your car without worry. Lastly, bring everything together with a tune. It is a vital piece to the puzzle in that it brings the modifications you have done to the engine, intake and exhaust to work together in harmony, while also unlocking the most power possible out of your car in its current state. It is recommended to get retuned as you modify your car more in regards to intake, exhaust or engine components. It is a lot easier to tune future modifications once you have the ability to tune your car via an ODB-II plugin device or stand-alone ECU; however, it is good to jump on this part early on and fine tune as you build.
– To meet the $10,000 budget, expect to spend around $575 for ignition coils; the catless midpipe is approximately $500 and the engine tuning device is around $600.
– Extra Cash – Lightweight flywheel and mated clutch kit. Sure, if you had the extra cash, it would be nice to just get a full custom exhaust and custom intake, but it’s a lot cheaper to get a little extra low-end grunt by going with this kit first.
INTERIOR
Getting a race seat is a great upgrade to focus on for the interior. Others like to focus on having as light as possible seats, but I like to include some comfort as well, given that I still drive the car to and from events. The benefit of a race seat is that you feel much more connected to the car, feeling exactly what is happening to the suspension components and tires. Harness belts are a great upgrade as well, but the main component is definitely the seat. I wouldn’t focus on having a harness belt on the passenger side so that instructors or a co-driver can quickly and easily get in and out of the car as needed.
– To meet the $10,000 budget, expect to spend about $800 for a racing seat and $100 for harness belts.
– Extra Cash – Removable steering wheel. The feedback from the car to your hands is more crisp, and the smaller steering wheels are more comfortable to hold.
UPDATE AND BACKDATE RULE
My favorite part about the Street Prepared category is it allows you to be really creative with your build, depending on the car. For the Series 1 RX-8, there are a few key parts that I would consider updating if you have the extra cash and have done all the above. The Series 2 RX-8 transmission is a lot beefier, as it can take more abuse and last a lot longer. It also has a slightly longer second gear, which helps out specifically towards Solo applications. The Series 2 also has a 4.777 final drive, which helps wake up the Series 1 (which comes with a 4.444). Again, not a priority, but worth it if you can manage the cost.
 ACCESSIBILITY